
How Do I Avoid Lens Flare In Drone Photography?
Have you ever taken a stunning aerial shot with your drone only to later discover pesky lens flare ruining the image? Lens flare can be a common issue in drone photography, but with the right techniques and equipment, you can easily avoid it. In this guide, I will provide you with valuable tips on how to prevent lens flare and capture clear, high-quality images with your drone.
Understanding Lens Flare
Before we dive into how to avoid lens flare in drone photography, let’s first understand what it is. Lens flare occurs when light enters your camera’s lens and reflects off the internal elements, causing unwanted artifacts in your photos. This often appears as bright spots, circles, or lines in your images, diminishing the overall quality of your shot.
Lens flare is more likely to happen in certain conditions, such as shooting directly into the sun or bright light sources. As drone photography involves shooting from high angles, the risk of lens flare increases due to the position of the sun relative to the drone’s camera. Understanding how lens flare occurs will help you anticipate and prevent it in your drone photography.
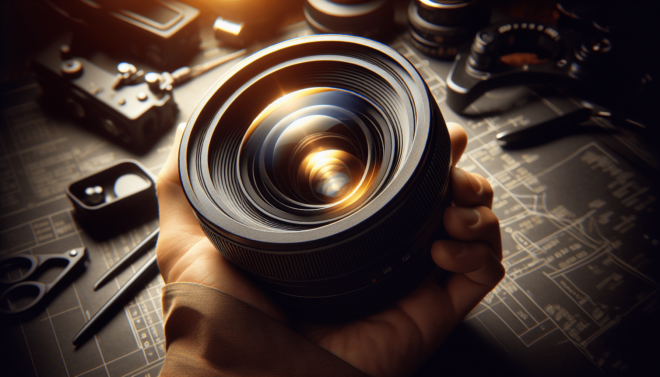
Why Lens Hood Is Essential
One effective way to prevent lens flare in drone photography is by using a lens hood. A lens hood is a tool that attaches to the front of your camera lens, shading it from direct light sources that can cause flare. By blocking out unwanted light, the lens hood helps maintain the quality of your images and reduces the risk of lens flare.
When choosing a lens hood for your drone camera, make sure to select one that fits snugly and securely around the lens. The hood should extend far enough to provide adequate shading without obstructing the field of view. Investing in a quality lens hood is a simple yet effective solution to combat lens flare and improve the overall quality of your drone photography.
Best Practices for Drone Photography
In addition to using a lens hood, there are several best practices that you can follow to avoid lens flare in drone photography. By incorporating these tips into your workflow, you can enhance the clarity and sharpness of your aerial shots.
Positioning Your Drone
One key factor in preventing lens flare is the positioning of your drone relative to the sun or other light sources. When flying your drone, be mindful of the sun’s position and avoid shooting directly into it. Position your drone in such a way that the light source is not directly hitting the camera lens, reducing the risk of lens flare in your photos.
Adjusting Camera Settings
Another way to minimize lens flare is by adjusting your camera settings. By controlling the exposure, ISO, and shutter speed of your drone camera, you can optimize the image quality and reduce the occurrence of flare. Experiment with different settings to find the ideal balance for capturing clear and vibrant aerial shots without unwanted artifacts.
Using Filters
Filters can also be a valuable tool in preventing lens flare in drone photography. Polarizing filters, in particular, are effective at reducing glare and reflections caused by bright light sources. By attaching a polarizing filter to your drone camera, you can enhance the colors and contrast in your photos while minimizing the risk of lens flare.
Avoiding Overexposure
Overexposure is another common issue that can lead to lens flare in drone photography. To avoid overexposure, be mindful of the brightness levels in your shots and adjust the exposure settings as needed. By properly exposing your images, you can maintain the details and clarity while minimizing the risk of lens flare ruining your aerial photos.
Choosing the Right Time of Day
The time of day plays a crucial role in avoiding lens flare in drone photography. In general, shooting during the golden hours—early morning or late afternoon—can minimize the harsh light that contributes to lens flare. During these times, the sun is lower in the sky, creating soft, warm light that enhances the colors and textures in your aerial shots.
Golden Hour Photography
The golden hour, also known as the magic hour, is a prime time for drone photography due to its soft, diffused light that reduces the risk of lens flare. Shooting during the golden hour can result in stunning aerial images with rich colors and a warm, inviting atmosphere. By timing your drone flights during this optimal period, you can capture breathtaking shots without worrying about unwanted artifacts like lens flare.
Avoiding Harsh Midday Sun
On the other hand, shooting during the harsh midday sun can increase the chances of lens flare in your drone photos. The direct overhead light during midday can create strong shadows and reflections that contribute to flare. To avoid this, plan your drone flights for early morning or late afternoon when the sun is lower in the sky and produces softer, more flattering light for aerial photography.
Cloudy Days
Cloudy days can also provide ideal conditions for drone photography by diffusing the light and minimizing the risk of lens flare. When the sky is overcast, the clouds act as a natural filter, softening the light and creating a more even illumination for your aerial shots. Take advantage of cloudy days for drone photography to capture clear, crisp images without worrying about lens flare ruining your photos.
Post-Processing Techniques
In addition to preventive measures, post-processing techniques can be used to remove or reduce lens flare in your drone photos. By editing your images using software tools, you can enhance the overall quality and clarity of your aerial shots.
Lens Correction
One post-processing technique for addressing lens flare is lens correction. In photo editing software like Adobe Lightroom or Photoshop, you can use lens correction tools to adjust the distortion and artifacts caused by flare. By applying lens correction adjustments, you can improve the sharpness and clarity of your drone images while minimizing the visible effects of lens flare.
Spot Healing
Spot healing is another useful tool for removing lens flare in post-processing. By using the spot healing brush in editing software, you can selectively remove unwanted artifacts and bright spots from your aerial photos. This allows you to clean up your images and achieve a polished, professional look without the distraction of lens flare.
Color Correction
Color correction can also help reduce the visibility of lens flare in drone photography. By adjusting the color balance, saturation, and temperature of your images, you can enhance the overall quality and minimize the distracting effects of flare. Experiment with different color correction techniques to find the best balance for your aerial shots and achieve vibrant, natural-looking results.
Conclusion
In conclusion, avoiding lens flare in drone photography is possible with the right techniques and equipment. By understanding how lens flare occurs and implementing preventive measures like using a lens hood, adjusting camera settings, and choosing the right time of day, you can capture clear, high-quality aerial shots without unwanted artifacts. Remember to experiment with different strategies and tools to find the best approach for your drone photography and achieve stunning results. By following these tips and incorporating post-processing techniques when necessary, you can elevate your drone photography and create captivating images that stand out from the rest.