
Understanding Exposure Settings for Drone Photography
When it comes to drone photography, adjusting exposure settings is crucial to capturing the perfect shot. But how exactly do you do it? In this guide, we’ll break down everything you need to know about adjusting exposure settings for drone photography.
What Are Exposure Settings?
Exposure settings in photography refer to the combination of aperture, shutter speed, and ISO that determine how much light reaches the camera sensor. Getting the right exposure is essential for achieving well-balanced and properly lit photographs.
Why is Adjusting Exposure Settings Important for Drone Photography?
Drone photography presents unique challenges when it comes to exposure settings. The height at which the drone is flying, as well as the changing light conditions, can make it tricky to get the perfect exposure. By adjusting your exposure settings correctly, you can ensure that your drone photos turn out clear, detailed, and well-lit.
Adjusting Exposure Settings on Your Drone Camera
Now that you understand the importance of exposure settings let’s dive into how you can adjust them on your drone camera.
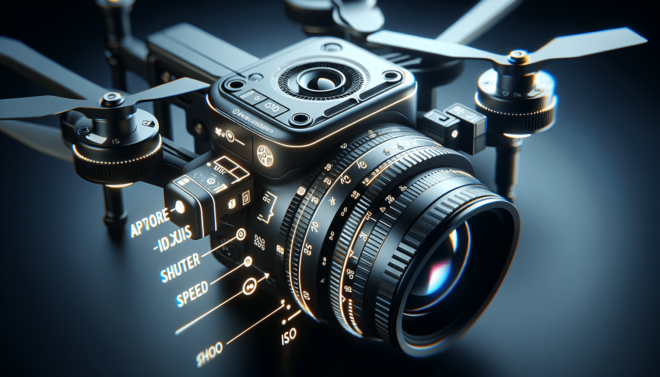
Aperture
Aperture refers to the opening in the lens through which light passes. A wider aperture lets in more light, while a smaller aperture lets in less. Adjusting the aperture allows you to control the depth of field in your photos.
When shooting drone photography, you can usually adjust the aperture settings in the camera settings. Keep in mind that a wider aperture (lower f-stop number) is ideal for low-light conditions, while a smaller aperture (higher f-stop number) is better for capturing landscapes with greater depth of field.
Shutter Speed
Shutter speed determines how long the camera’s shutter remains open to let light in. A faster shutter speed freezes motion, while a slower shutter speed creates motion blur. Adjusting the shutter speed is crucial for capturing sharp, clear images in drone photography.
In drone photography, you’ll want to adjust the shutter speed depending on the speed of your drone and the movement of your subject. A faster shutter speed is ideal for capturing fast-moving subjects, while a slower shutter speed can create artistic motion blur effects.
ISO
ISO measures the sensitivity of the camera sensor to light. A lower ISO setting is less sensitive to light but produces less noise, while a higher ISO setting is more sensitive to light but can result in more noise or graininess in the photo.
When adjusting ISO for drone photography, try to keep it as low as possible to maintain image quality. However, in low-light conditions, you may need to increase the ISO to capture a well-exposed image without introducing too much noise.
Tips for Adjusting Exposure Settings in Different Lighting Conditions
Lighting conditions play a significant role in determining the best exposure settings for your drone photography. Here are some tips for adjusting exposure settings in different lighting conditions.
Shooting in Bright Sunlight
In bright sunlight, you’ll need to be mindful of harsh shadows and blown-out highlights. To avoid overexposure, use a lower ISO setting, a faster shutter speed, and a smaller aperture. Adjust your exposure compensation if necessary to ensure that your photos are well-exposed.
Shooting in Low Light
When shooting in low light conditions, such as during sunrise or sunset, you’ll need to increase your ISO setting, use a slower shutter speed, and open up your aperture to let in more light. Be mindful of noise when increasing the ISO, and consider using a tripod to stabilize your drone for longer exposures.
Shooting in Overcast Conditions
On overcast days, the diffused light can create soft, even lighting ideal for drone photography. Use a mid-range ISO setting, a moderate shutter speed, and adjust your aperture based on the depth of field you want to achieve. Consider using exposure bracketing to capture a range of exposures and merge them later for optimal results.
Advanced Techniques for Adjusting Exposure Settings
For more advanced drone photographers, there are some additional techniques you can use to fine-tune your exposure settings and take your aerial photography to the next level.
Using ND Filters
ND (neutral density) filters are handy accessories that can help you control the amount of light entering your drone camera. By using ND filters, you can effectively reduce the amount of light without affecting the color or contrast of your photos. Experiment with different ND filter strengths to achieve the desired exposure settings in various lighting conditions.
Bracketing Exposures
Exposure bracketing involves taking multiple shots at different exposure settings to ensure that at least one of them is well-exposed. This technique is especially useful when lighting conditions are challenging or when you want to capture a wide dynamic range of light and shadow in your photos. Combine the bracketed exposures in post-processing to create a perfectly exposed final image.
Using Histograms
Histograms are graphical representations of the tonal distribution in your photos, showing the distribution of light and dark tones. By using histograms on your drone camera, you can quickly assess whether your exposure settings are capturing the full range of tones in your scene. Aim for a well-balanced histogram with peaks in the midtones and minimal clipping in the shadows or highlights.
Conclusion
Adjusting exposure settings for drone photography may seem daunting at first, but with practice and experimentation, you’ll quickly become adept at capturing stunning aerial images. Remember to consider the unique challenges of shooting from a drone, such as changing light conditions and the movement of your subject. By mastering exposure settings, you can elevate your drone photography to new heights and capture breathtaking images from above.