
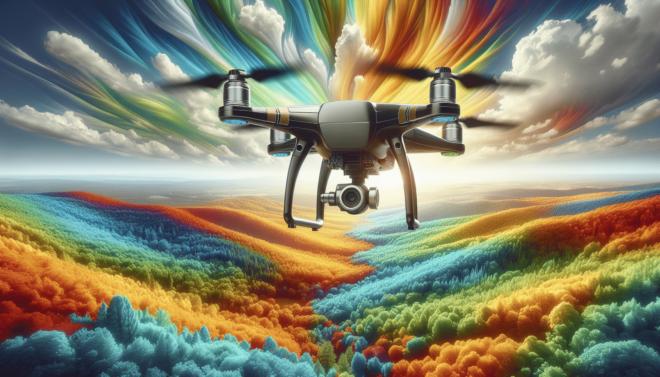
What Are The Best Settings For Color Grading Drone Footage In DaVinci Resolve?
So you’ve captured some stunning aerial footage with your drone, but now you’re ready to take it to the next level with color grading in DaVinci Resolve. But where do you start? In this article, we’ll walk you through the best settings to use for color grading drone footage in DaVinci Resolve to help you achieve professional-looking results.
Understanding Color Grading
Before we dive into the best settings for color grading drone footage in DaVinci Resolve, let’s first understand the basics of color grading. Color grading is the process of adjusting and enhancing the colors of a video to achieve a certain look or mood. It involves adjusting the exposure, contrast, color balance, and saturation of the footage. When done correctly, color grading can greatly enhance the visual impact of your videos.
Why Is Color Grading Important?
Color grading is an essential part of the post-production process that can set the mood, enhance the storytelling, and give your videos a professional look. It allows you to correct any color issues in the footage, create a cohesive look across the entire video, and even stylize the visuals to match your creative vision. By mastering color grading, you can take your drone footage to the next level and make it stand out from the rest.
Best Settings for Color Grading Drone Footage in DaVinci Resolve
Now that you have a basic understanding of color grading, let’s dive into the best settings to use when color grading drone footage in DaVinci Resolve. By using the right settings, you can achieve the desired look for your video and make it visually stunning.
1. Color Space and Gamma
When importing your drone footage into DaVinci Resolve, it’s important to set the correct color space and gamma settings. This will ensure that your footage is displayed accurately and allows you to have more control over the colors during the grading process. For drone footage, it’s recommended to set the color space to “Blackmagic Design” and the gamma to “Blackmagic Design Film.”
2. Resolution and Bit Depth
For optimal color grading results, it’s best to work with your drone footage in its highest resolution and bit depth. This will give you more flexibility when adjusting the colors and making corrections without losing quality. Make sure to set your project settings in DaVinci Resolve to match the resolution and bit depth of your drone footage.
3. Timeline Settings
Before you start color grading, make sure to set up your timeline settings in DaVinci Resolve correctly. You can adjust the timeline resolution, frame rate, and playback options to match your drone footage settings. This will ensure that your color grading adjustments are applied accurately and that the final output looks as desired.
4. Color Correction vs. Color Grading
It’s essential to differentiate between color correction and color grading when working on your drone footage in DaVinci Resolve. Color correction involves fixing any technical issues in the footage, such as exposure, white balance, and saturation, to achieve a balanced and accurate representation of the colors. Color grading, on the other hand, is the creative process of stylizing the visuals and enhancing the mood of the video. Make sure to start with color correction before moving on to color grading to ensure a solid foundation.
5. Primary Color Correction
Start your color grading process with primary color correction in DaVinci Resolve. This involves adjusting the exposure, contrast, white balance, and saturation of the footage to get a balanced and natural look. Use the Lift, Gamma, and Gain controls to adjust the shadows, midtones, and highlights of the image. Aim to achieve a well-exposed and color-balanced image before moving on to more creative grading techniques.
6. Secondary Color Correction
After you’ve completed the primary color correction, you can move on to secondary color correction to further refine the look of your drone footage. This involves isolating specific colors or areas in the frame using masks, qualifiers, and power windows to make targeted adjustments. For example, you can enhance the sky, water, or landscape separately to make them pop and stand out in the frame. Secondary color correction allows you to fine-tune the colors of your footage and create a more dynamic visual impact.
7. Curves and Color Wheels
Utilize the curves and color wheels in DaVinci Resolve to make precise color adjustments and stylize the look of your drone footage. Curves allow you to adjust the tonal range of the image, while color wheels give you control over the color balance and temperature. Experiment with the RGB curves and lift, gamma, gain controls in the color wheels to achieve the desired color grading look. Don’t be afraid to play around with different settings to find the perfect balance for your drone footage.
8. LUTs and Presets
To speed up your color grading workflow in DaVinci Resolve, consider using LUTs (Look-Up Tables) and presets. LUTs are pre-defined color grades that can be applied to your footage to achieve a specific look or style quickly. DaVinci Resolve comes with built-in LUTs, or you can download custom LUTs online to expand your options. Presets, on the other hand, allow you to save and apply your favorite color grading settings for future projects. By using LUTs and presets, you can streamline your color grading process and achieve consistent results in your drone footage.
9. Export Settings
Once you’ve completed color grading your drone footage in DaVinci Resolve, it’s time to export the final video with the best settings. Make sure to set the export resolution, frame rate, and codec settings to match your intended delivery platform. Whether you’re exporting for YouTube, Vimeo, or a professional film festival, choose the settings that will preserve the quality of your color-graded footage. Aim for the highest quality settings possible to ensure that your video looks stunning and professional when viewed on various devices.
Conclusion
In conclusion, color grading drone footage in DaVinci Resolve can be a rewarding and creative process that elevates the visual storytelling of your videos. By following the best settings and techniques outlined in this article, you can achieve professional-looking results and make your drone footage stand out. Remember to start with color correction, explore different color grading tools and effects, and experiment with styles to find your unique look. With practice and attention to detail, you can create visually stunning drone footage that captivates and engages your audience. Happy grading!