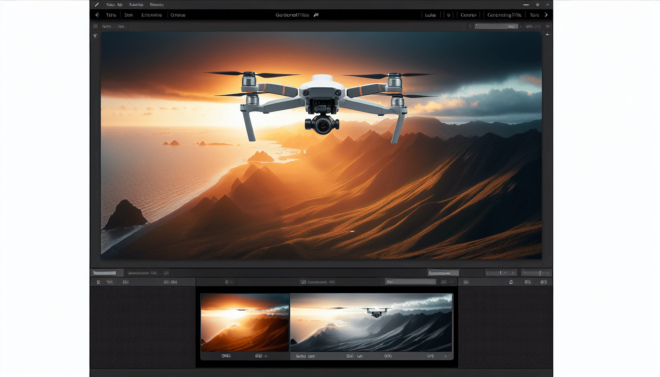
Have you ever wondered how to enhance the beauty of your drone photos using Lightroom? Drone photography offers unique perspectives, but editing is crucial to make those shots truly shine. In this article, we’ll discuss how to add a graduated filter in Lightroom specifically for drone photos. This tool can elevate your editing game, giving your aerial shots a professional touch.
Why Use Lightroom for Drone Photos?
Lightroom is a powerful, full-featured photo editing software that’s especially useful for drone photography. Whether you’re adjusting lighting, removing blemishes, or enhancing colors, Lightroom provides all the necessary tools. It allows you to simplify your workflow and produce stunning, high-quality images.
Lightroom Presets: An Introduction
Before diving into graduated filters, it’s worth mentioning Lightroom presets. Presets are predefined settings that make the editing process faster and more consistent. For drone photography, applying a preset specific to aerial shots can be a game-changer.
Pros of Using Lightroom Presets:
| Pros | Description |
|---|---|
| Speed | Quick adjustments save time. |
| Consistency | Uniform edits across multiple photos. |
| Professional Quality | Access to expert-level edits. |
Applying a Drone Photography Preset
Presets are easily applied in Lightroom. Import your drone photos, navigate to the ‘Develop’ module, and browse through your collection of presets. Select a preset suitable for drone photography to give your image an instant enhancement.
The Graduated Filter: What Is It?
A graduated filter in Lightroom allows you to apply effects gradually across your photo. This is particularly useful for drone photography, where the sky and land often require different adjustments. The tool enables you to create a seamless transition between these two elements.
Benefits of Using Graduated Filters
Improved Sky Details: Tweak the exposure to enhance cloud details. Balanced Exposure: Modify the lighting between the sky and the ground. Enhanced Colors: Boost color saturation for a more vivid look.
Step-by-Step Guide to Adding a Graduated Filter
Step 1: Open Your Photo in Lightroom
Start by importing your drone photos into Lightroom and selecting the image you want to edit.
Step 2: Navigate to the Develop Module
From the Library module, switch to the Develop module. This is where you’ll find all the tools necessary for photo editing, including the graduated filter.
Step 3: Select the Graduated Filter Tool
In the right-side panel, locate the graduated filter tool. It’s represented by a rectangular icon with a gradient.
Step 4: Drag the Filter Across Your Photo
Click and drag the filter across the area of your photo you want to adjust. For drone photos, you’ll typically want to start at the horizon and pull upwards to adjust the sky, or downwards to adjust the foreground.
Step 5: Adjust Filter Settings
With the graduated filter in place, you can now tweak various settings like exposure, contrast, highlights, shadows, and clarity. These adjustments will gradually apply across the image, creating a smooth transition.
Settings Overview:
| Setting | Description |
|---|---|
| Exposure | Adjust brightness levels. |
| Contrast | Enhance the difference between light and dark areas. |
| Highlights | Fine-tune the brightest parts. |
| Shadows | Improve details in darker areas. |
| Clarity | Increase mid-tone contrast for a more defined look. |
Step 6: Fine-tune the Filter
Use the feather slider to control how smoothly the effect transitions across the photo. You can also move the filter around to better target specific areas.
Step 7: Review and Apply Additional Filters
Once satisfied, you can add more graduated filters to different parts of the photo. This is particularly useful if your image has multiple segmented areas needing adjustment.
Enhancing Your Drone Photos Further
Use Radial Filters
Radial filters are another excellent tool in Lightroom. While graduated filters work best for vertical or horizontal transitions, radial filters help you target circular areas. This is great for highlighting a specific point of interest in your drone photo.
Change the Perspective
Drone photos often capture expansive landscapes, but sometimes the perspective may need adjustment. Lightroom’s Transform tool helps you correct distortions and achieve a more balanced composition.
Enhance Clarity and Sharpness
Drone photos can lose some sharpness due to camera movement or atmospheric conditions. Use Lightroom’s sharpening tools to enhance details and achieve crisper images.
Common Mistakes to Avoid
Over-Editing
One of the most common mistakes is over-editing your photos. It’s easy to get carried away, but subtlety is key. Small changes often have the most significant impact without making the image look unnatural.
Ignoring the Histogram
The histogram is your best friend in photo editing. It provides a graphical representation of light distribution in your image. Pay attention to it to ensure you’re not over or under-exposing your photo.
Not Using Multiple Filters
Relying on a single graduated filter might not always suffice. Don’t hesitate to use multiple filters to address different parts of your image. This comprehensive approach often yields better results.
Final Tips for Drone Photography in Lightroom
Shoot in RAW Format
RAW files contain more data and offer greater flexibility during post-processing. This is crucial for drone photography, where lighting conditions can vary dramatically.
Use Lens Corrections
Drone cameras can sometimes introduce lens distortions. Lightroom’s lens correction features help you fix these issues, ensuring your photos look as natural as possible.
Batch Processing
If you have multiple drone photos taken under similar conditions, batch processing can save you a lot of time. Apply your settings to one photo and then synchronize them across other photos in the series.
Batch Processing Tips:
| Tip | Description |
|---|---|
| Consistency | Ensures uniform edits across photos. |
| Efficiency | Saves editing time by processing multiple images simultaneously. |
| Flexibility | Allows you to adjust settings for a large number of photos at once. |
Conclusion
Adding a graduated filter in Lightroom is an essential skill for any drone photographer. This tool allows you to balance lighting, enhance colors, and bring out the best in your aerial shots. By following the steps outlined above and incorporating additional tips, you’ll be well on your way to creating stunning drone photos that captivate and inspire.
Whether you’re a seasoned professional or a photography enthusiast, these techniques will help you unlock the full potential of your drone images. So, next time you go out to capture some breathtaking aerial shots, remember the power of Lightroom and its graduated filter. Happy editing!

