
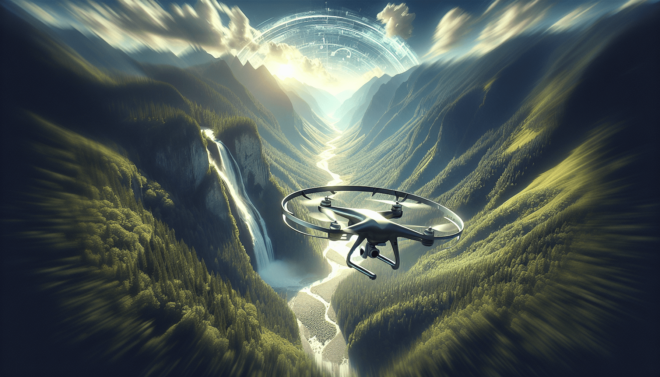
Have you ever wondered how to take your drone photography to the next level? Whether you’re a seasoned pilot or just starting with drone photography, Adobe Lightroom can become your best friend in post-processing your shots. One particularly powerful tool in Lightroom for enhancing drone photos is the Radial Filter. In this article, you’ll explore how to use the Radial Filter in Lightroom to make your drone photos pop and stand out from the rest.
Introduction to Drone Photography and Lightroom
Drone photography is a game-changer. Capturing images from the sky offers unique perspectives and unparalleled opportunities for creativity. However, even the best drone photographs often need some editing to truly shine. Adobe Lightroom is a popular choice among photographers for its robust editing capabilities.
Why Use Lightroom for Drone Photos?
Lightroom is particularly useful for drone photography due to its range of features designed to enhance color, clarity, and composition. The software supports RAW files, which many drones use to capture high-quality images. This allows for more extensive editing without losing image quality.
Importance of Post-Processing
Without post-processing, drone photos can sometimes look flat or lack the desired impact. Adjusting aspects like exposure, contrast, and sharpness can transform an ordinary photo into a stunning piece of art. That’s where Lightroom comes in handy, especially with tools like the Radial Filter.
Getting Started with Lightroom
Before you jump into advanced techniques, it’s crucial to understand the basics of Lightroom. If you’re new to the software, start by importing your photos and getting familiar with the interface.
Importing Your Drone Photos
- Open Lightroom and go to the ‘Library’ module.
- Click on ‘Import’ and select your drone photos.
- Choose the destination folder and click ‘Import’ again.
Once your photos are imported, they’re ready for editing.
Basic Adjustments
Before using the Radial Filter, you might want to perform some basic adjustments:
- Exposure: Correct the overall exposure of the photo.
- Contrast: Increase or decrease the contrast to add depth.
- White Balance: Adjust the temperature and tint to get accurate colors.
- Clarity and Dehaze: Enhance the texture and remove atmospheric haze.
Understanding the Radial Filter
The Radial Filter in Lightroom allows you to apply adjustments to a specific, elliptical area of your photo. This is particularly useful for highlighting subjects, creating a vignette effect, or drawing attention to particular areas.
Activating the Radial Filter
- Go to the ‘Develop’ module.
- Click on the Radial Filter icon (it looks like a circle with a dot in the middle) or press
Shift + M.
With the Radial Filter activated, you can start making selective adjustments.
Using the Radial Filter for Drone Photos
Highlighting the Subject
Drone photos often capture wide landscapes or scenes with many elements. By using the Radial Filter, you can highlight the main subject and draw viewers’ attention to it.
- Create a Radial Filter: Click and drag to create an elliptical selection around your subject.
- Invert the Mask: Check the ‘Invert Mask’ option to apply adjustments inside the ellipse.
- Adjust Exposure and Brightness: Increase the exposure and brightness inside the selection to make the subject stand out.
Creating a Vignette Effect
A subtle vignette can help focus attention and add drama to your drone photos.
- Create a Radial Filter: Click and drag to cover the area you want to affect.
- Invert the Mask: Leave the ‘Invert Mask’ unchecked to apply adjustments outside the ellipse.
- Reduce Exposure: Lower the exposure outside the selection to create a natural vignette.
Enhancing Sunsets and Sky
Drone photos often feature expansive skies. Use the Radial Filter to enhance sunsets or skies by adjusting the colors and clarity.
- Create a Radial Filter: Select the area across the sky.
- Adjust Temperature and Tint: Warm up the sky by increasing the temperature and adding a hint of magenta.
- Increase Clarity and Dehaze: Enhance details in the clouds and sky by adjusting clarity and dehaze settings.
Advanced Techniques with the Radial Filter
Multiple Radial Filters
You’re not limited to just one Radial Filter per photo. Utilize multiple filters to achieve various effects.
- Highlight Multiple Subjects: Create separate Radial Filters for each subject you want to highlight.
- Layer Adjustments: Apply different settings to each filter layer for a more complex look.
Feathering the Filter
Feathering smooths the transition between the adjusted area and the rest of the photo, making the changes look natural.
- Feather Slider: Increase the feather value to soften the edges of the Radial Filter.
- Experiment: Adjust the feathering to see what looks best for each specific photo.
Combining Filters
Combine the Radial Filter with other Lightroom tools for even more control over your drone photos.
- Graduated Filter: Use the Graduated Filter to adjust the exposure and contrast across a large area, then refine with the Radial Filter.
- Brush Tool: Use the Brush tool to further fine-tune specific areas within or outside the Radial Filter’s selection.
Practical Examples
Case Study: Urban Landscape
Imagine you have a drone shot of an urban landscape. There are buildings, streets, and perhaps a river cutting through the city.
- Apply Basic Adjustments: Start with exposure, contrast, and clarity adjustments.
- Highlight Key Buildings: Use the Radial Filter to brighten and sharpen the key buildings.
- Create a Vignette: Add a subtle vignette to focus attention on the city center.
Case Study: Natural Landscape
Suppose you captured a sprawling natural landscape with mountains, forests, and a sunset.
- Enhance Colors: Use the Radial Filter to enhance the colors of the sunset.
- Highlight a Focal Point: Apply the filter to a focal point like a mountain peak.
- Add Clarity: Increase clarity and dehaze for the sky to bring out the details.
Common Mistakes and How to Avoid Them
Overusing the Radial Filter
Too much adjustment can make your photos look unnatural. It’s crucial to strike a balance.
Solution: Make subtle adjustments and constantly compare with the original photo to keep it looking natural.
Not Feathering the Filter
A hard edge can be distracting and make your edits obvious.
Solution: Always use the feather slider to soften the edges of your Radial Filter.
Ignoring the Rest of the Image
Focusing only on one part of the image can make the rest of it look neglected.
Solution: After using the Radial Filter, revisit global adjustments to ensure the entire photo looks cohesive.
Tips for Improving Your Drone Photography
Camera Settings
Before even editing, capturing good quality drone photos is essential.
- Shoot in RAW: This allows for greater flexibility in post-processing.
- Use Manual Settings: Control ISO, shutter speed, and aperture for better exposure.
- Bracket Your Shots: Take multiple photos at different exposures to blend later.
Composition Techniques
Great drone photos often follow specific compositional rules.
- Rule of Thirds: Place the subject along the grid lines rather than centering it.
- Leading Lines: Use natural or man-made lines to lead the viewer’s eye through the photo.
- Patterns and Symmetry: Capture repeating patterns or symmetric scenes for visually appealing shots.
Pre-Flight Checks
Ensure your drone and camera settings are optimized before taking off.
- Battery Check: Always start with fully charged batteries.
- Clean Lens: Ensure your camera lens is clean to avoid spots and blurs.
- Weather Conditions: Fly during optimal weather conditions to avoid wind and rain that can affect your shots.
Final Thoughts
Editing drone photos in Lightroom, particularly with the Radial Filter, can elevate your images to new heights. By carefully applying this tool, you can highlight subjects, create depth, and enhance natural beauty in your photos. Remember, the key is to make subtle, thoughtful adjustments that enhance your image without making it look overdone.
Lightroom offers a myriad of tools, and mastering the Radial Filter is just one step toward becoming adept at drone photo editing. Through experimentation and practice, you can discover your unique style and make your aerial shots truly mesmerizing.
So, next time you upload your drone captures into Lightroom, don’t forget to experiment with the Radial Filter. Happy editing!