
How Do I Edit Drone Photos For A High-dynamic-range (HDR) Look?
Introduction to HDR Photography
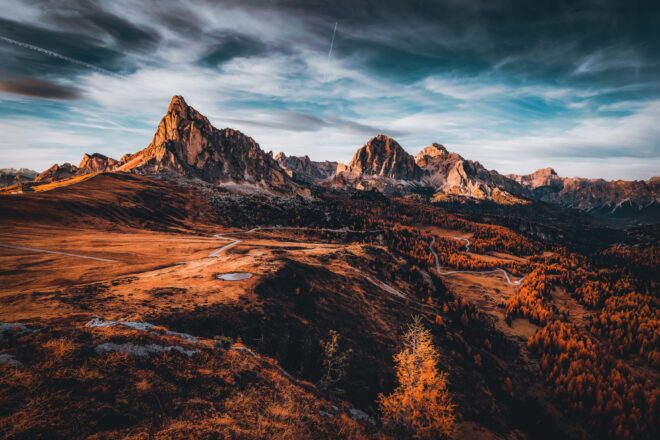
You may have seen stunning photos with vibrant colors and intricate details that seem to leap off the screen. These images are likely the result of High-dynamic-range (HDR) photography, a technique that captures a broader range of luminosity than standard photography. If you’re looking to achieve this striking visual effect in your drone photos, you’re in the right place! In this article, we’ll walk you through the process of editing drone photos to achieve a High-dynamic-range (HDR) look.
Understanding HDR Photography
Before diving into the editing process, it’s essential to understand what HDR photography is. Essentially, HDR photography combines multiple exposures of the same scene to capture a wider range of highlights and shadows. This results in an image with more detail and color depth. When done right, HDR photography can create captivating and visually appealing images that stand out from the ordinary.
Equipment and Software Requirements
To edit drone photos for an HDR look, you’ll need the right equipment and software. Make sure you have a drone with a good camera that can capture high-quality images. Additionally, you’ll need a reliable photo editing software that supports HDR editing features. Some popular options include Adobe Lightroom, Photoshop, and Aurora HDR. These tools offer advanced editing capabilities that will help you achieve the desired HDR effect in your drone photos.
Capturing Bracketed Exposures
To create an HDR image, you’ll first need to capture bracketed exposures with your drone. Bracketing involves taking multiple shots of the same scene at different exposure levels. This allows you to capture the full range of highlights and shadows in the scene. Most drones have an auto-bracketing feature that simplifies this process, making it easier to capture the necessary exposures for HDR editing. Make sure to adjust the exposure settings based on the scene’s lighting conditions to ensure proper bracketing.
Importing Photos to Your Editing Software
Once you have captured the bracketed exposures, it’s time to import them into your chosen editing software. Most editing programs allow you to import multiple images simultaneously, making the process quick and efficient. Organize the bracketed exposures in the editing software’s workspace to prepare for the HDR editing process. This step sets the foundation for creating a stunning HDR image from your drone photos.
Combining Exposures for HDR Editing
The next step in editing drone photos for an HDR look is to combine the bracketed exposures into a single HDR image. Using the software’s HDR merging tool, blend the different exposures to create a well-balanced image that captures the full dynamic range of the scene. Adjust the settings to blend the exposures seamlessly, ensuring a natural and realistic-looking result. This process enhances the details and colors in the image, creating a visually striking HDR effect.
Enhancing Details and Colors
After merging the exposures, it’s time to enhance the details and colors in your HDR image. Use the editing software’s tools to adjust the contrast, clarity, and sharpness of the image. Experiment with color saturation and vibrancy settings to bring out the richness and depth of the colors in the scene. Fine-tune the white balance and tone settings to achieve a balanced and visually appealing HDR look. These adjustments will help elevate the overall quality of your drone photos and create a captivating visual impact.
Correcting Distortions and Noise
In HDR photography, it’s crucial to correct distortions and noise that may affect the image quality. Use the lens correction tools in your editing software to fix any optical distortions or vignetting in the image. Additionally, reduce noise and graininess in the photo using the noise reduction features available in the software. These corrections ensure a clean and professional-looking HDR image that showcases the true essence of the scene captured by your drone.
Fine-tuning Exposure and Highlights
One of the key aspects of editing drone photos for an HDR look is fine-tuning exposure and highlights. Adjust the exposure levels to bring out the details in the shadows and highlights of the image. Use the software’s highlight recovery tools to prevent overexposure and blown-out highlights in the HDR image. By carefully adjusting the exposure and highlights, you can create a well-balanced and visually impactful HDR photo that captures the essence of the scene with precision.
Creating a Dynamic Look with Tone Mapping
Tone mapping is a technique used in HDR editing to create a dynamic and visually appealing look in the final image. Experiment with different tone mapping presets and settings to enhance the overall contrast and depth of the HDR photo. Adjust the tone curve to create a more dramatic or natural look, depending on your artistic vision for the image. Tone mapping allows you to add creative flair to your drone photos and elevate them to a new level of visual storytelling.
Adding Finishing Touches
To complete the editing process, add the finishing touches to your HDR image. Use the software’s vignette and sharpening tools to refine the overall look of the photo. Crop the image if necessary to focus on the main subject and enhance composition. Apply creative filters or presets to add a unique style to the final image. Pay attention to the small details that can make a big difference in the overall impact of your HDR drone photo. By adding these finishing touches, you can create a polished and professional-looking image that showcases your editing skills and creativity.
Saving and Exporting Your HDR Photo
Once you are satisfied with the editing adjustments and enhancements, it’s time to save and export your HDR photo. Choose the appropriate file format and resolution settings for your intended use of the image. Save a high-quality version of the HDR photo to preserve the details and colors of the image. Consider creating different versions of the HDR photo for web display, print, or social media sharing. By saving and exporting your HDR photo correctly, you can showcase your work effectively and share it with the world.
Conclusion
Editing drone photos for a High-dynamic-range (HDR) look is a creative and rewarding process that can elevate your photography skills to new heights. By following the steps outlined in this article and experimenting with different editing techniques, you can create stunning HDR images that captivate viewers and leave a lasting impression. Remember to practice and refine your editing skills to achieve the desired HDR effect in your drone photos. With dedication and creativity, you can unlock the full potential of HDR photography and create visually striking images that stand out from the rest. Happy editing!