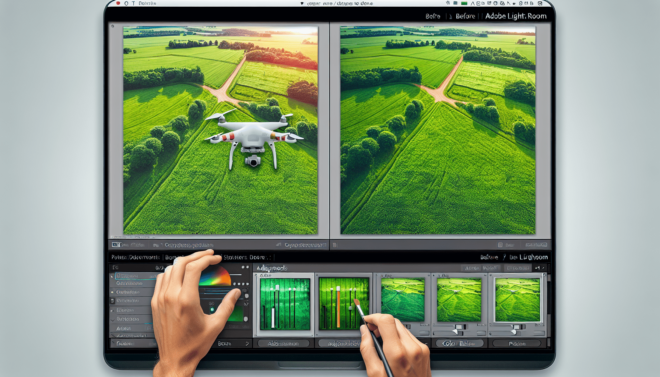
Have you ever captured stunning aerial shots with your drone only to find that they need a little extra tweaking to make them pop? Editing drone photos can be a game-changer, enhancing details and colors for an impressive final image. Luckily, Adobe Lightroom offers powerful tools designed to help you take your drone photography to a professional level. This guide will walk you through how to edit drone photos in Lightroom, offering practical tips and techniques to make your aerial photos stand out.
Getting Started with Lightroom
Lightroom is a versatile photo editing software that is particularly useful for drone photography. Before diving into the specific edits, you’ll need to upload your photos to Adobe Lightroom. Here’s how to get started:
- Importing Your Photos: Open Lightroom and select the
Importbutton at the bottom of the Library module. Navigate to your drone photos, select them, and clickImport. - Organizing Your Photos: Create folders and collections in Lightroom to keep your aerial photos organized. This will make it easier to find and edit specific shots in the future.
Applying Presets
One of the easiest ways to kickstart your editing process in Lightroom is by using presets. Presets are pre-configured settings that can be applied to your photos with a single click, and they can significantly speed up your workflow.
Using Drone-Specific Presets
Apply a preset designed specifically for drone photography to quickly enhance your images. These presets typically adjust multiple settings like exposure, contrast, and color, transforming your photo instantly.
Steps to Apply a Preset:
- Go to the
Developmodule in Lightroom. - On the left panel, you’ll see the
Presetssection. - Choose a drone photography preset and click on it to apply to your selected photo.
Customizing Presets
Even after applying a preset, you might still want to fine-tune the settings to better match your vision. Customize the preset by tweaking individual sliders for exposure, contrast, and color in the right-hand panel.
Basic Adjustments
Basic adjustments form the foundation of your photo editing process. In Lightroom, you can adjust exposure, contrast, highlights, shadows, whites, and blacks to make your drone photos more balanced and eye-catching.
Setting Exposure
Exposure refers to the brightness of your photo. Adjust this to ensure your image is well-lit without overexposing the highlights or underexposing the shadows.
Steps to Set Exposure:
- In the
Developmodule, locate theBasicpanel. - Adjust the
Exposureslider. Move it to the right to increase brightness or to the left to decrease it.
Enhancing Contrast and Clarity
Contrast impacts the difference between dark and light areas in your photo, while clarity adds midtone contrast, bringing out details.
Steps to Enhance Contrast and Clarity:
- In the
Basicpanel, adjust theContrastslider to highlight differences between dark and light areas. - Use the
Clarityslider to enhance fine details without increasing noise.
Adjusting Color
Color adjustments can make your drone photos burst with vibrancy or maintain a more muted, realistic tone. The HSL (Hue, Saturation, and Luminance) panel allows you to fine-tune these aspects.
Using the HSL Panel
The HSL panel breaks down colors into three main adjustments:
- Hue: Changes the actual color.
- Saturation: Adjusts the intensity of the color.
- Luminance: Controls the brightness of the color.
Steps to Adjust Colors:
- In the
Developmodule, go to theHSL/Colorpanel. - Select
Allto view Hue, Saturation, and Luminance sliders. - Adjust each slider to enhance different colors in your photo.
Adding a Graduated Filter
A Graduated Filter can be used to apply adjustments gradually across your image, perfect for enhancing skies in aerial shots.
Steps to Add a Graduated Filter:
- Click the
Graduated Filtertool in the toolbar. - Click and drag on your photo to create the filter. Adjust the size and angle as needed.
- Use the adjustment sliders to enhance specific parts of your photo like the sky or the ground.
Using Radial Filters for Focused Edits
Radial filters allow for more targeted adjustments in circular areas of your photo. This can be particularly useful for highlighting specific elements in drone photography, such as a lone tree in a field or a feature in the landscape.
Creating a Radial Filter
Radial Filters help you focus on particular parts of your photo, enhancing specific areas without affecting the entire image.
Steps to Create a Radial Filter:
- Click the
Radial Filtertool in the toolbar. - Draw a circle over the area you want to adjust.
- Use the sliders to change settings like exposure, clarity, and contrast within the selected area.
Changing the Perspective
Drone photos often contain unique perspectives that you might want to straighten, reframe, or correct for lens distortion.
Adjusting the Crop and Straighten Tool
The Crop and Straighten tool can help you correct the horizon and reframe your photo to focus on specific elements.
Steps to Adjust the Crop and Straighten Tool:
- Select the
Crop Overlaytool from the toolbar. - Adjust the angle slider or use the rotate handles to straighten the horizon.
- Drag the edges of the crop to reframe your photo as desired.
Correcting Lens Distortion
Lens correction is essential in drone photography for dealing with distortions caused by wide-angle lenses.
Steps for Lens Correction:
- In the
Developmodule, find theLens Correctionspanel. - Check the
Enable Profile Correctionsbox. - Lightroom will automatically use the camera and lens data to correct the distortion.
Advanced Techniques
Once you’ve mastered basic adjustments, you can use more advanced techniques to take your drone photos to the next level.
Utilizing the Tone Curve
The Tone Curve allows for fine-tuning of shadow, midtone, and highlight adjustments, offering more control over contrast.
Steps to Use the Tone Curve:
- In the
Developmodule, go to theTone Curvepanel. - Adjust the line to tweak shadows, midtones, and highlights separately.
Using the Brush Tool
The Brush Tool allows you to paint adjustments onto specific parts of your photo, offering precision editing.
Steps to Use the Brush Tool:
- Click the
Brush Toolin the toolbar. - Adjust the size, feather, and flow of the brush.
- Paint over the areas you want to adjust and use the sliders to apply your desired changes.
Final Touches
Finishing touches can make a huge difference in the overall look and feel of your photo. These might include sharpening, noise reduction, and adding subtle vignettes.
Sharpening Your Image
Sharpening enhances the details in your photo, making it appear crisper and more defined.
Steps to Sharpen Your Image:
- In the
Developmodule, open theDetailspanel. - Adjust the
Amount,Radius, andDetailsliders to sharpen your image.
Reducing Noise
Drone photos can suffer from noise, especially in low-light conditions. Noise reduction helps clean up graininess in your photos.
Steps to Reduce Noise:
- In the
Detailspanel, use theLuminanceandColorsliders underNoise Reduction. - Adjust until your image appears smoother without losing too much detail.
Adding Vignettes
A vignette can draw attention to the center of your photo, creating a more focused look.
Steps to Add a Vignette:
- Open the
Effectspanel in theDevelopmodule. - Use the
Amountslider underPost-Crop Vignettingto adjust the intensity of the vignette.
Exporting Your Photos
Once you’re satisfied with your edits, you’ll need to export your photos for sharing or printing.
Export Settings
Lightroom offers extensive options for exporting your photos. You can adjust the file format, quality, and size based on where and how you plan to use your images.
Steps to Export Your Photos:
- Click
Filein the top menu and then selectExport. - Choose your desired settings including export location, file naming, file format, and quality.
- Click
Exportto save your edited photos.
| Export Setting | Description |
|---|---|
| File Format | Choose between JPEG, TIFF, etc. |
| Quality | Adjust level of details and file size |
| Image Size | Resize image as needed |
| Output Sharpening | Sharpen image for screen or print |
| Metadata | Include or exclude metadata |
Conclusion
Editing drone photos in Lightroom can transform your images from good to spectacular. By applying presets, making basic and advanced adjustments, and utilizing tools like radial and graduated filters, you can bring out the best in your drone photography. Remember, practice makes perfect, so keep exploring Lightroom’s features to refine your editing skills further.
Whether you’re a beginner or an experienced photographer, these tips and techniques will help you make the most of your aerial shots. So, get your drone up in the air, capture those stunning vistas, and bring them to life in Lightroom!

