
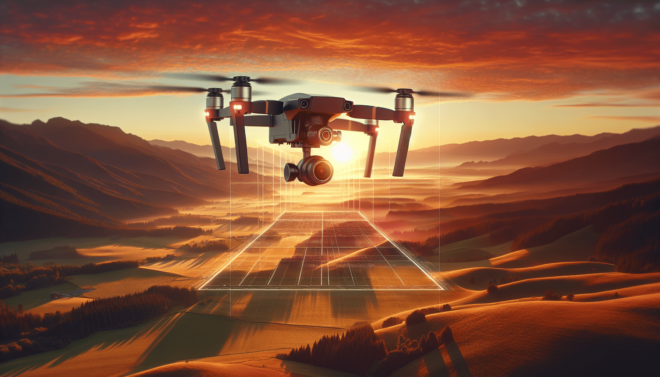
What Are The Best Practices For Exporting Drone Footage For YouTube Using DaVinci Resolve?
Have you ever wondered how to optimize your drone footage for YouTube but felt overwhelmed by the technical aspects of exporting videos? In this article, we will explore the best practices for exporting drone footage for YouTube using DaVinci Resolve. By following these tips, you can ensure that your videos look professional and are optimized for the platform.
Understanding YouTube Export Settings
When exporting drone footage for YouTube, it is important to optimize your video settings to ensure the highest quality and compatibility with the platform. YouTube has specific guidelines for video formats, resolutions, and bitrates to ensure that your videos look great on all devices. By understanding these settings, you can create videos that look professional and are optimized for YouTube.
Video Format
YouTube recommends using the MP4 format for all videos uploaded to the platform. This format is widely supported and ensures high compatibility with various devices and browsers. When exporting your drone footage in DaVinci Resolve, make sure to choose the MP4 format to ensure that your video is compatible with YouTube.
Resolution
For best results on YouTube, it is recommended to export your videos in 1080p resolution (1920×1080) or higher. Higher resolutions, such as 4K (3840×2160), can provide better quality, but may also result in larger file sizes. When exporting your drone footage, choose a resolution that balances quality with file size to ensure optimal viewing experience for your audience.
Bitrate
Bitrate refers to the amount of data encoded in your video per second and directly impacts the quality of your footage. YouTube recommends using a bitrate of at least 8 Mbps for 1080p videos and 35-45 Mbps for 4K videos. When exporting your drone footage in DaVinci Resolve, make sure to adjust the bitrate according to the resolution of your video to ensure the highest quality playback on YouTube.
Exporting Drone Footage in DaVinci Resolve
DaVinci Resolve is a powerful video editing software that offers a wide range of features for editing and exporting videos. When exporting drone footage for YouTube using DaVinci Resolve, there are several settings that you need to adjust to ensure the best quality and compatibility with the platform.
Timeline Settings
Before exporting your drone footage in DaVinci Resolve, make sure that your timeline settings match the resolution and frame rate of your video. You can adjust the timeline settings by clicking on the gear icon in the bottom right corner of the timeline. Set the resolution and frame rate to match your drone footage to avoid any quality loss during export.
Export Settings
When exporting your drone footage in DaVinci Resolve, navigate to the Deliver tab to access the export settings. Here, you can choose the format, resolution, bitrate, and other settings for your video. Make sure to select the MP4 format, adjust the resolution and bitrate according to YouTube’s guidelines, and customize any other settings based on your preferences.
Rendering Options
DaVinci Resolve offers several rendering options that can affect the quality and performance of your exported video. When exporting drone footage for YouTube, consider using the “YouTube” preset under the Format tab to ensure that your video meets the platform’s requirements. You can also adjust the rendering quality, codec, and other settings to optimize your video for YouTube playback.
Optimizing Drone Footage for YouTube
In addition to adjusting the export settings in DaVinci Resolve, there are a few extra steps you can take to optimize your drone footage for YouTube. By following these best practices, you can enhance the quality of your videos and attract more viewers on the platform.
Color Correction
Color correction can make a huge difference in the overall look and feel of your drone footage. Before exporting your video in DaVinci Resolve, make sure to color correct and grade your footage to enhance the colors and create a more cinematic look. You can use the color grading tools in DaVinci Resolve to adjust the exposure, contrast, saturation, and other visuals aspects of your video.
Audio Enhancement
Good audio quality is essential for creating engaging videos on YouTube. Make sure to enhance the audio quality of your drone footage by adjusting the volume, removing background noise, and adding music or sound effects. You can use the audio editing tools in DaVinci Resolve to improve the audio quality of your videos before exporting them for YouTube.
Adding Titles and Graphics
To make your drone footage more engaging and informative, consider adding titles, graphics, and other visual elements to your video. You can use the title tools in DaVinci Resolve to create professional-looking titles and captions for your videos. Adding graphics, logos, and other visual elements can also enhance the overall presentation of your drone footage on YouTube.
Uploading Drone Footage to YouTube
Once you have exported and optimized your drone footage in DaVinci Resolve, it’s time to upload your videos to YouTube. Follow these steps to ensure that your videos are properly uploaded and optimized for YouTube viewers.
Video Title and Description
When uploading your drone footage to YouTube, make sure to create a descriptive and engaging title for your video. The title should be clear, concise, and include relevant keywords to help viewers discover your content. Additionally, write a detailed description for your video that provides context, information, and keywords related to your content.
Tags and Thumbnails
Tags and thumbnails play a crucial role in optimizing your drone footage for YouTube search results and recommendations. Add relevant tags to your video that describe the content, location, and other relevant information. Create an eye-catching thumbnail that accurately represents the content of your video and attracts viewers to click and watch.
Video SEO
Search engine optimization (SEO) is essential for increasing the visibility and discoverability of your drone footage on YouTube. Optimize your video for SEO by including relevant keywords in the title, description, tags, and metadata. Consider using tools like Google Keyword Planner or YouTube Analytics to find popular keywords and phrases for your content.
Conclusion
Exporting drone footage for YouTube using DaVinci Resolve can seem like a daunting task, but by following these best practices, you can create professional videos that attract more viewers and engagement on the platform. By optimizing your video settings, adjusting export settings in DaVinci Resolve, and enhancing your drone footage with color correction, audio editing, and visual elements, you can create high-quality videos that stand out on YouTube. Remember to upload your videos with descriptive titles, engaging descriptions, relevant tags, and eye-catching thumbnails to maximize the reach and impact of your drone footage on YouTube.